
Picture this: you have guests coming over, the fridge is packed, the oven is preheating, and right in the middle of the chaos, your refrigerator stops cooling or your oven refuses to heat properly. If that sounds familiar, you are not alone. Surveys in recent years show that well over half of households have had a key kitchen appliance fail at the worst possible time, often during busy holidays or family gatherings.
Modern appliances are supposed to make life easier, but in 2026 they also fail more often and earlier than many people expect. A large repair database of over 900,000 interventions shows that washing machines, dishwashers, and fridges account for the majority of appliance repair, and “won’t start” or “won’t cool” are among the most common complaints. At the same time, many repairs now involve control boards, sensors, and Wi‑Fi modules instead of simple knobs and switches, which means more things can go wrong when software glitches or when owners skip basic maintenance.
The good news: a big chunk of these problems are simple and fixable at home with a few basic tools and some patience. Technicians estimate that up to 30 percent of service calls are for issues the homeowner could have solved themselves with a bit of guidance, like cleaning coils, clearing clogged filters, or resetting a machine. By learning a few DIY steps, you can often save 100 to 400 dollars per repair, which is the typical range for a professional visit in 2026, including parts and labor.
This guide walks through the 10 most common home appliance problems and gives you clear, step‑by‑step instructions to troubleshoot and fix them, plus quick “call a pro if…” warnings so you do not push DIY too far. You will learn how to handle issues with refrigerators, washers, dryers, dishwashers, ovens, air conditioners, garbage disposals, microwaves, ice makers, and water heaters, and how to prevent repeat failures with a simple yearly maintenance routine.
Important note: this guide is for educational purposes only and is not a substitute for professional repair or safety advice. Always unplug or shut off power and water before working on appliances, stop immediately if you smell gas or burning, and when in doubt, step back and call a licensed technician.
Essential tools & safety basics every homeowner needs
You do not need a full workshop to handle most basic appliance issues. A small tool kit plus a few safety items will take you a long way. Helpful tools include a set of Phillips and flathead screwdrivers, an adjustable wrench, a nut driver set, a basic multimeter for checking power, a flashlight or headlamp, a wet/dry vacuum, a stiff brush for coils, and a shop towel or rags. A simple non‑contact voltage tester is also useful to confirm that power is really off before you touch anything electrical.
Safety comes first, every time. Always unplug the appliance or switch off the correct breaker before you remove panels or touch wiring. For gas appliances, if you ever smell gas, hear hissing, or suspect a leak, do not try to fix it yourself—shut off the gas at the main valve if you can do so safely, leave the area, and call your gas company or emergency services. Avoid working in standing water, do not bypass safety switches, and never run an appliance with exposed wires or panels removed.
For most jobs, you should stop DIY and call a pro if you see burned wiring, smell burning plastic, find signs of major leaks inside walls or ceilings, or if your troubleshooting points to sealed system components like compressors in fridges, high‑voltage magnetrons in microwaves, or complex control boards you are not comfortable replacing. When dealing with breakers or electrical panels, always follow local codes and never attempt work that requires a licensed electrician unless you are qualified.
2026 Smart Appliance Warning: More appliances are now connected to Wi‑Fi and controlled by apps. If a smart appliance is acting up—showing error codes, going offline, or not responding—start with software: reboot the appliance, update its firmware through the official app, and reset the Wi‑Fi connection following the manufacturer’s instructions before opening any panels. Do not factory‑reset or install unofficial firmware unless the brand clearly supports it, or you may void your warranty.
Common problems & DIY potential
DIY difficulty and time are estimates for basic troubleshooting by a careful homeowner; complex faults or older units may need professional service.
1. Refrigerator / freezer not cooling or freezing
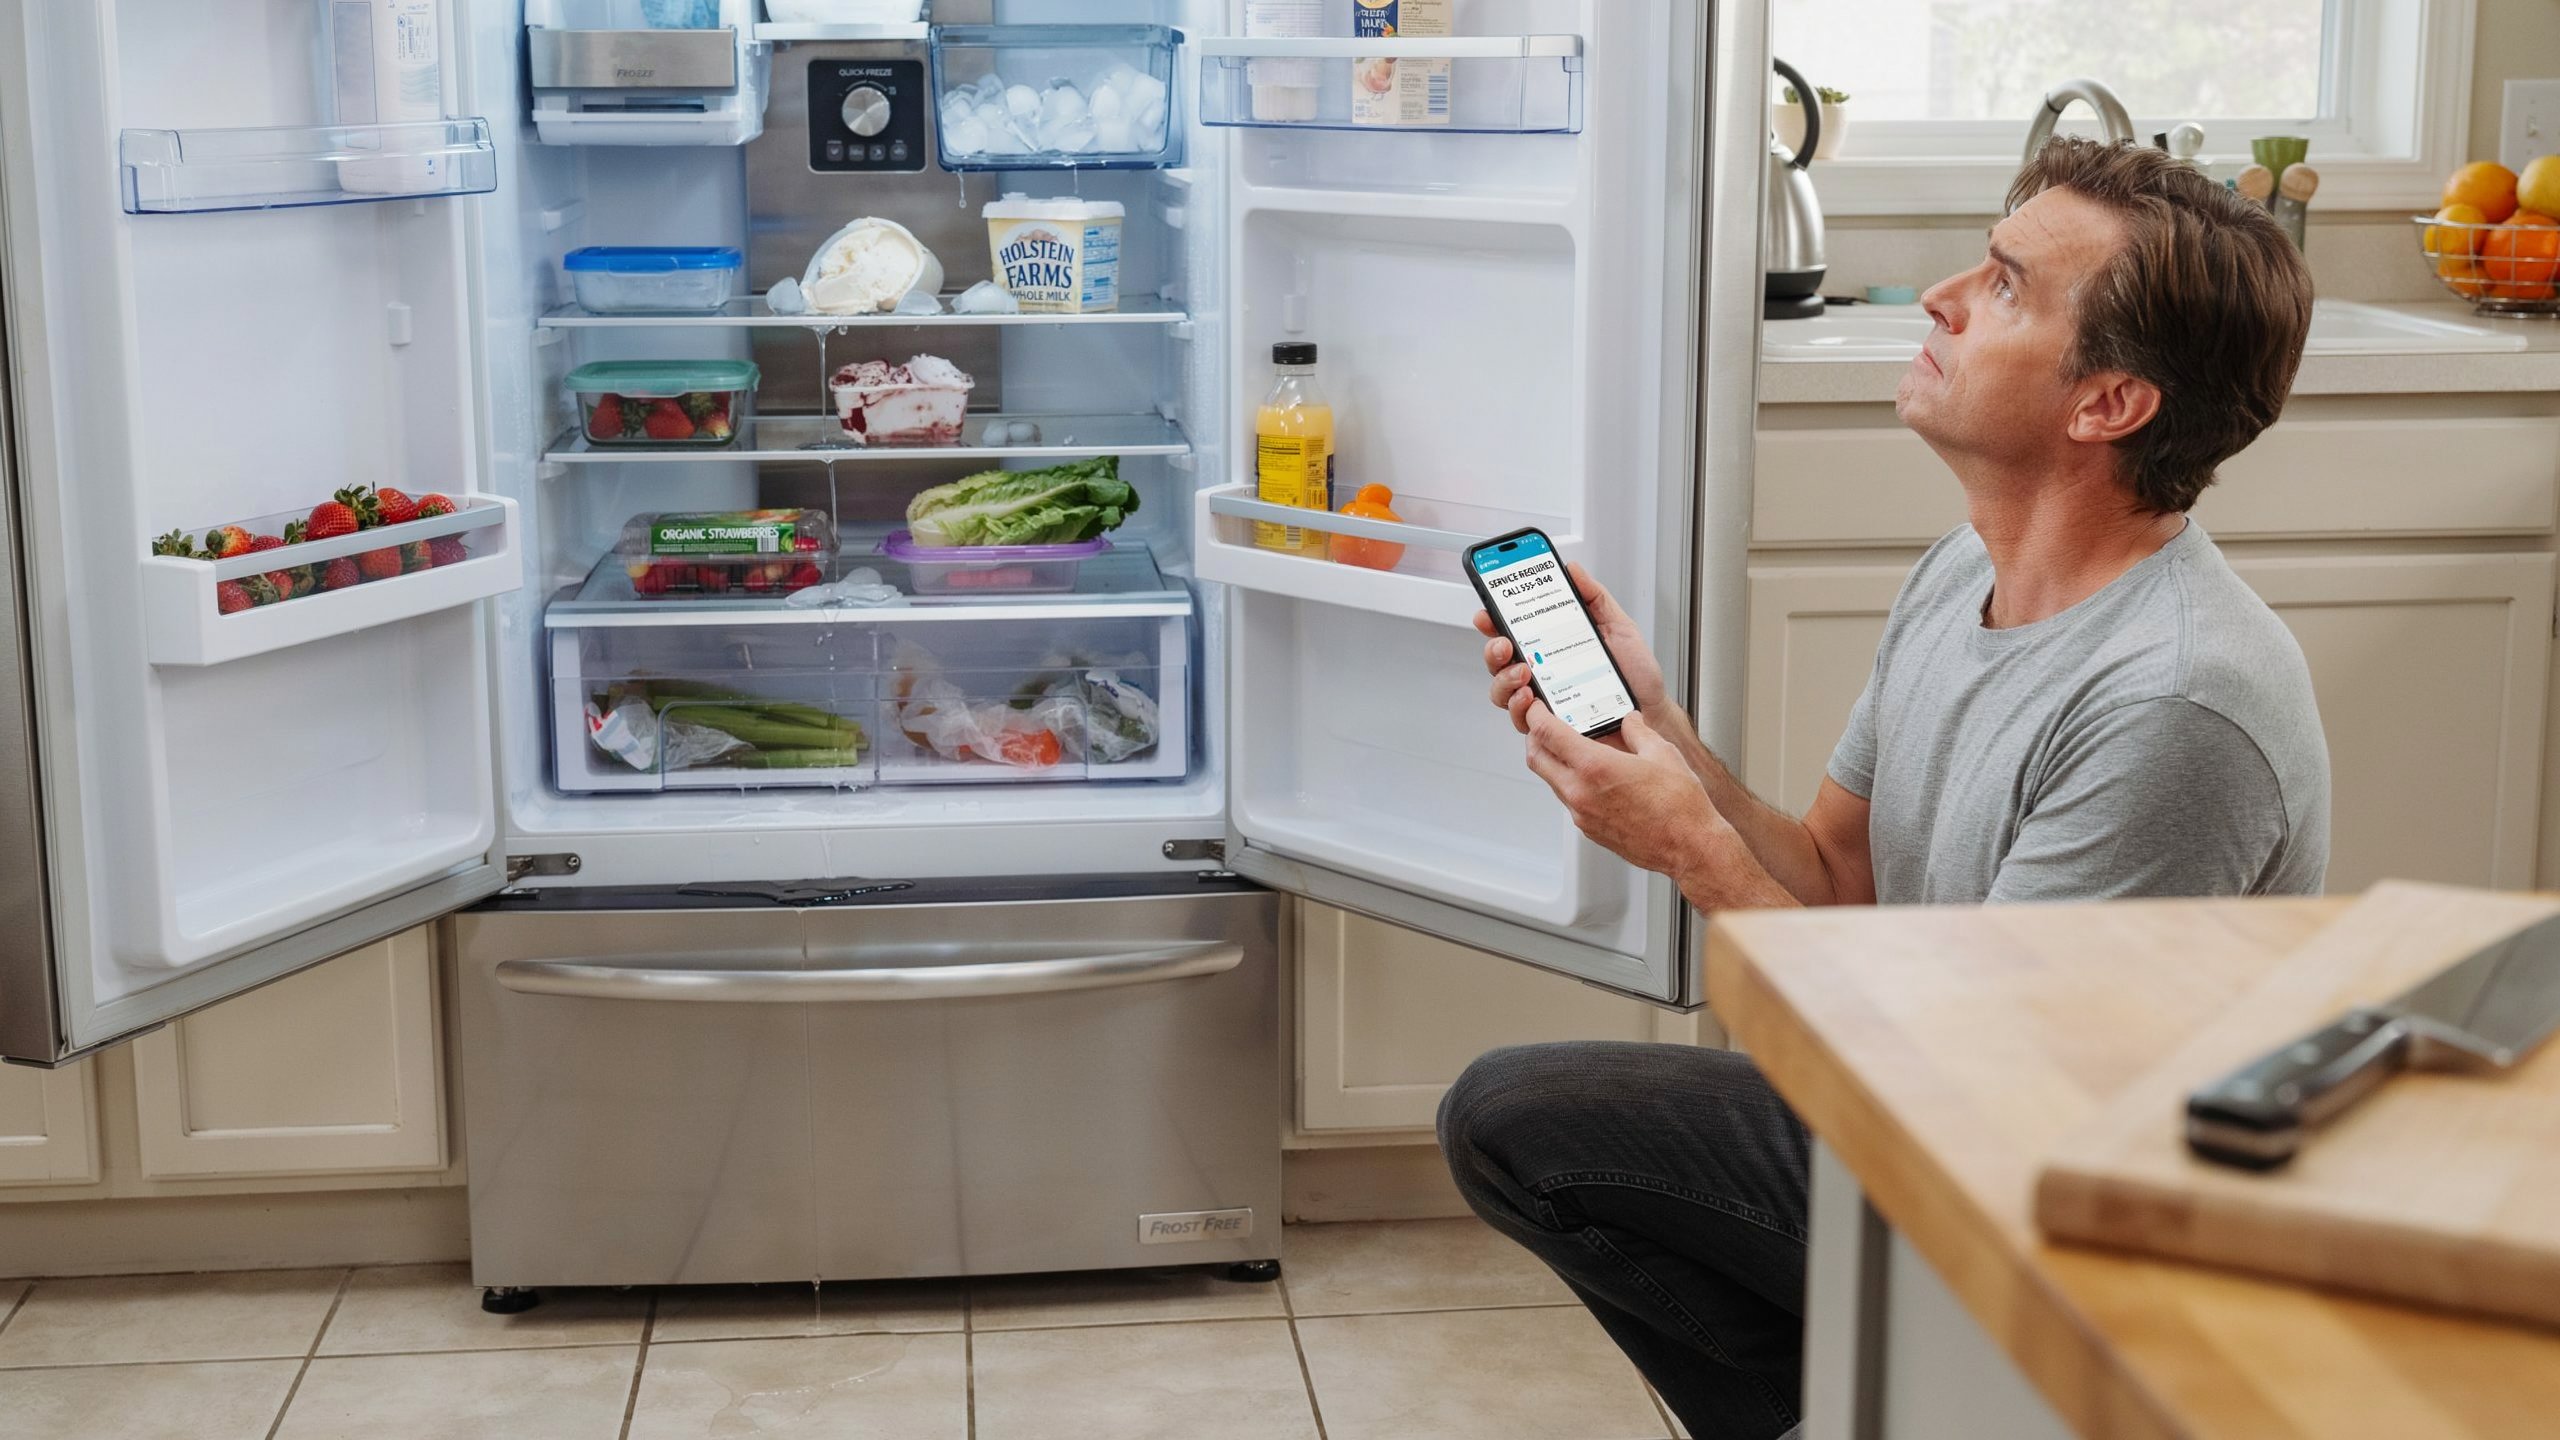
A refrigerator that is warm or a freezer that cannot keep food frozen is one of the most stressful household problems, especially when you risk losing a week’s worth of groceries. The most common causes are surprisingly simple: dirty condenser coils, blocked air vents between the freezer and fridge sections, incorrect temperature settings, or a door that is not sealing properly. In many homes, coils have not been cleaned in years, and dust and pet hair choke off airflow so the compressor has to work overtime.
Step‑by‑step DIY fix
-
Check power and settings (5–10 minutes). Make sure the fridge is plugged in, the outlet works, and the temperature is set correctly—around 35–38°F (1.7–3.3°C) for the fridge and 0°F (about −18°C) for the freezer.
-
Listen and feel for airflow (5 minutes). Open the freezer and listen for the evaporator fan; you should hear a small fan when the compressor is running. Place your hand near the vents to feel cold air movement.
-
Clear blocked vents (10 minutes). If shelves are crammed full or packages are pressed right against the vents, move food so air can flow freely between sections.
-
Clean condenser coils (20–30 minutes). Unplug the fridge. Remove the front kick plate or rear panel to locate the coils, then use a vacuum and coil brush to clear dust and debris. Clean coils every 6–12 months as maintenance.
-
Check the door seals (10 minutes). Inspect the rubber gaskets for cracks, gaps, or heavy dirt. Clean them with warm soapy water and dry well. If a thin sheet of paper pulls out easily when the door is closed, the seal may need replacing.
-
Give it time to recover (several hours). After these steps, close the doors and wait 12–24 hours for temperatures to stabilize before deciding if the fridge has recovered.
Estimated time: 30–90 minutes for basic checks and cleaning.
Estimated cost: 0–30 dollars for a coil brush and cleaning supplies, versus 200–500 dollars if you need a technician to correct cooling issues or replace a thermostat or compressor.
Prevention tips
Keep coils clean twice a year, avoid overpacking shelves, and check gaskets every few months for cracks or mold buildup. Try not to leave doors open for long periods, especially in hot weather, and leave space around the fridge so it can vent heat from the back and sides.
Call a pro if…
Call a professional if the compressor is running constantly but temperatures do not improve, if there is loud grinding from internal fans, if you see frost thickly coating coils behind the rear freezer panel, or if the unit is completely dead after you have checked the outlet and breaker. Sealed system work, refrigerant leaks, and compressor or control board failures are not good DIY jobs and need specialized tools.
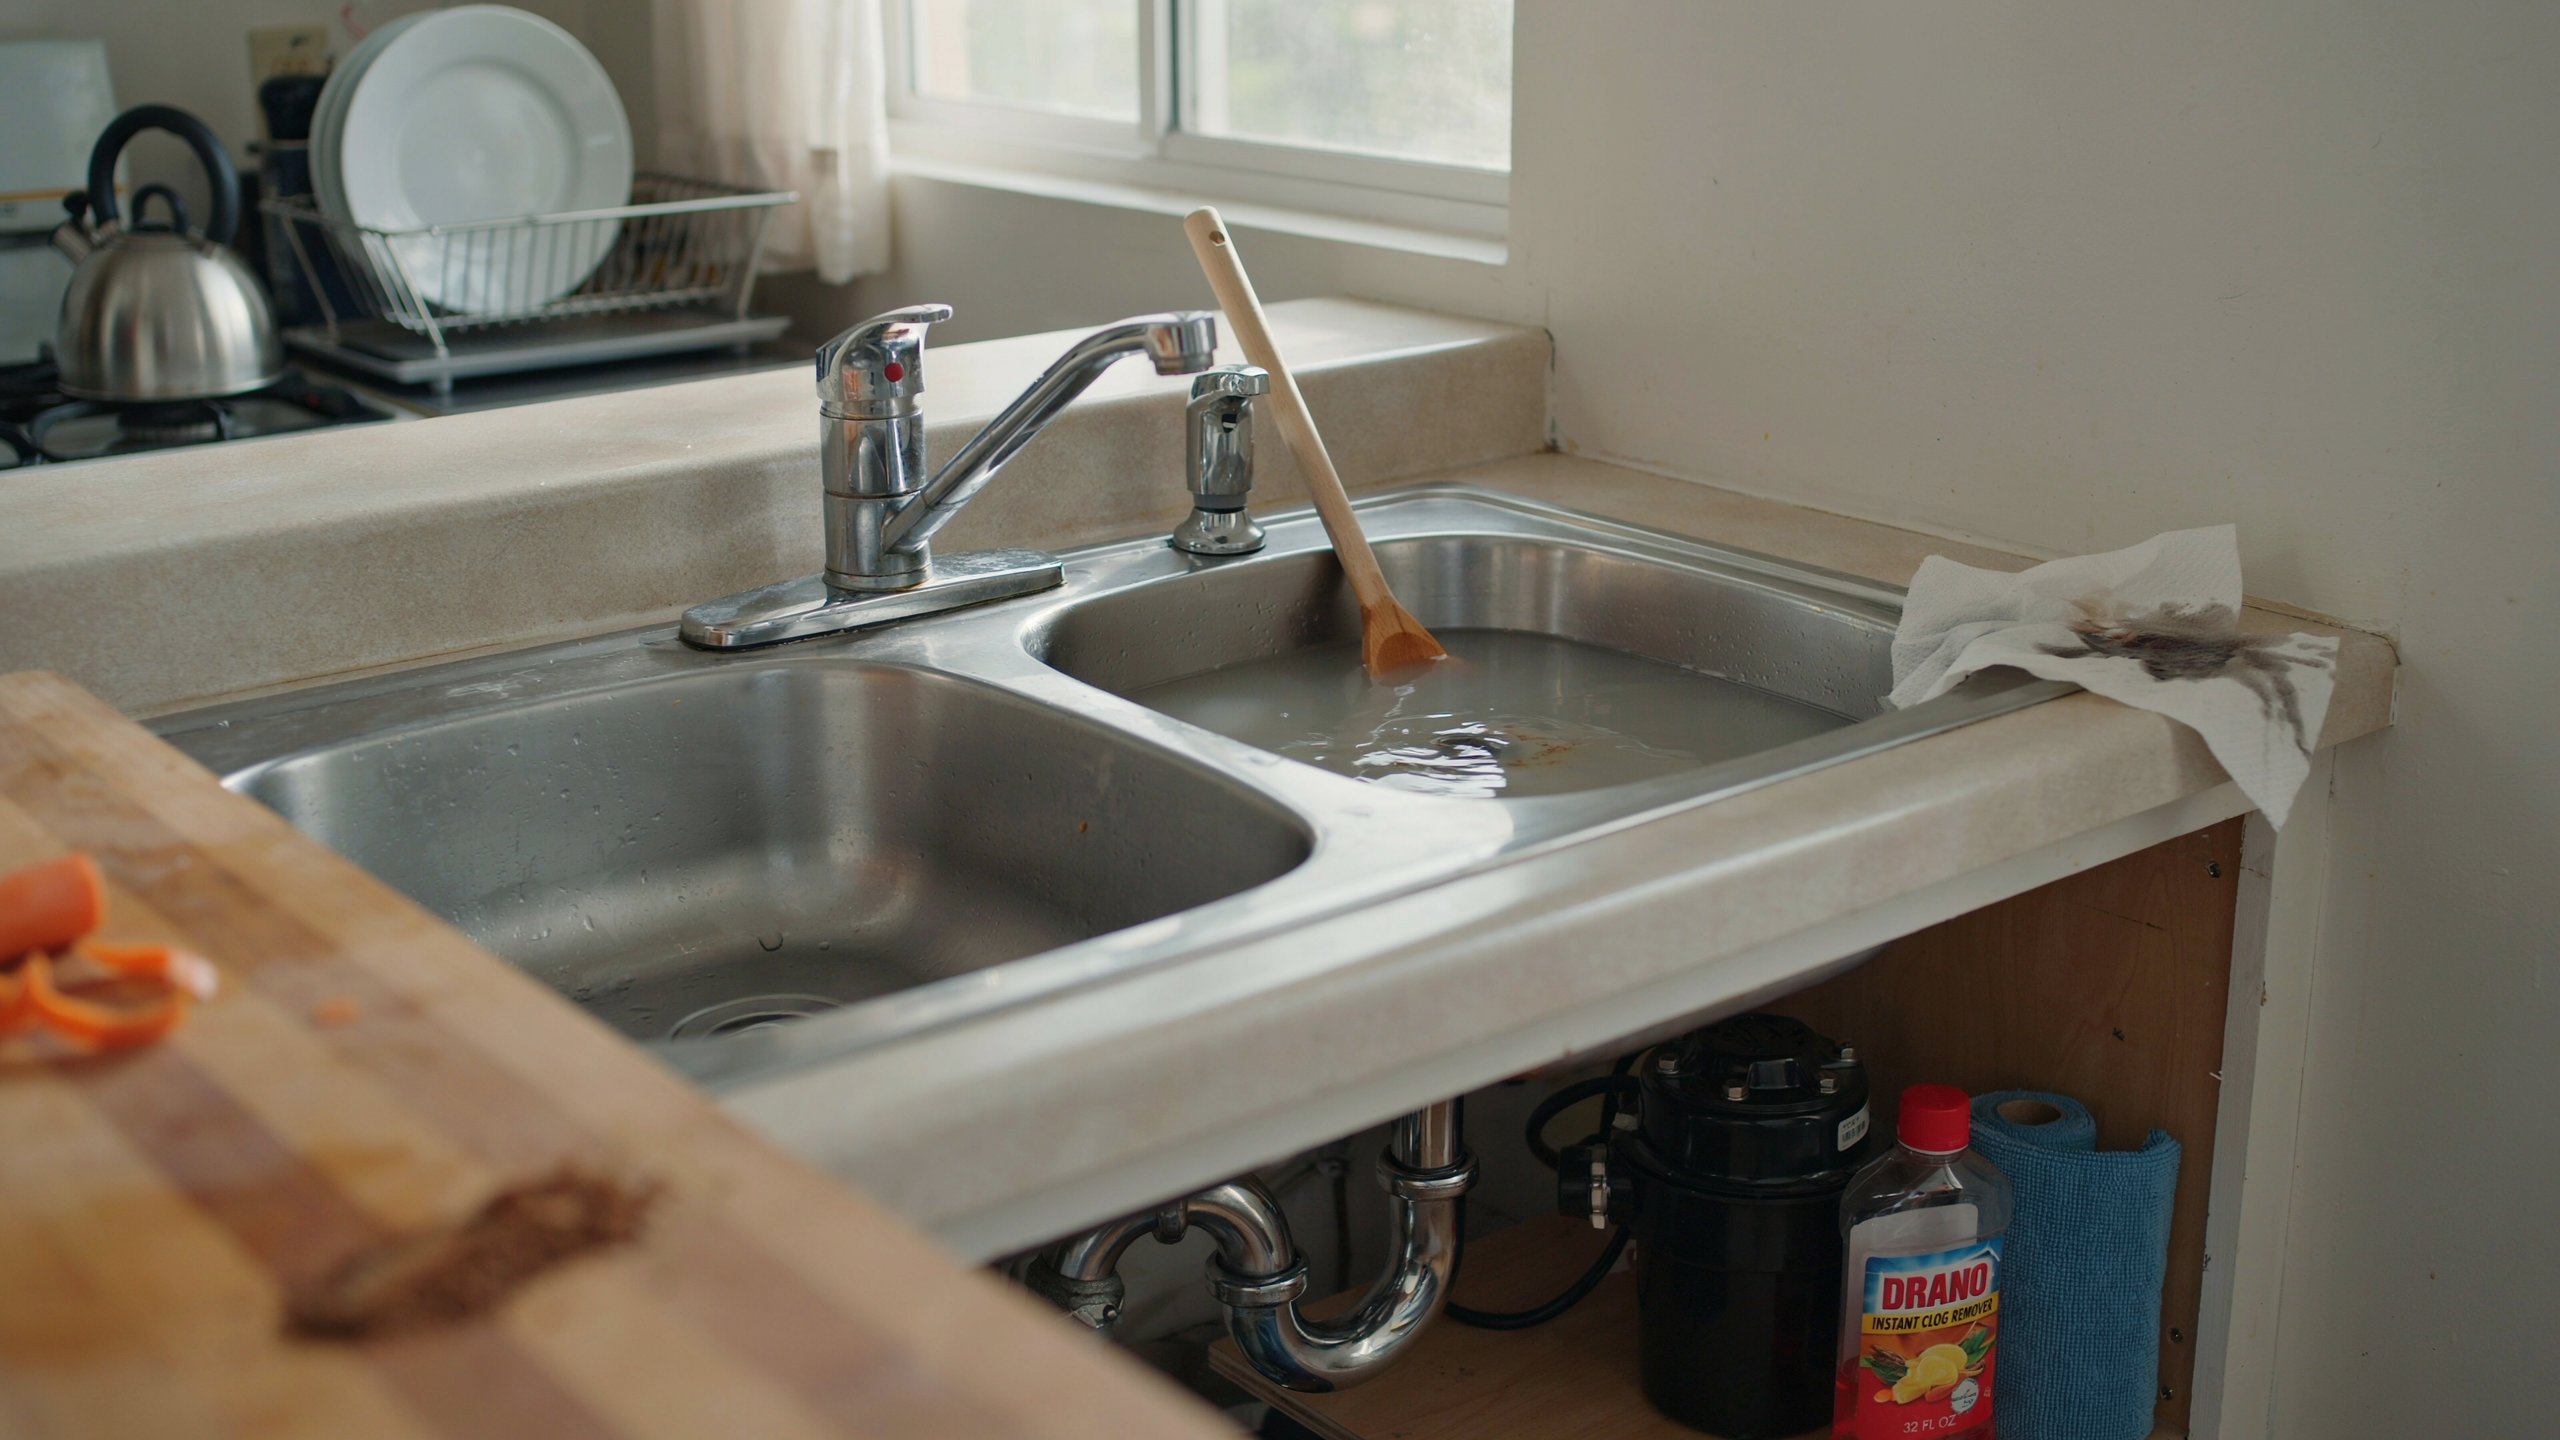
2. Washing machine not draining or spinning
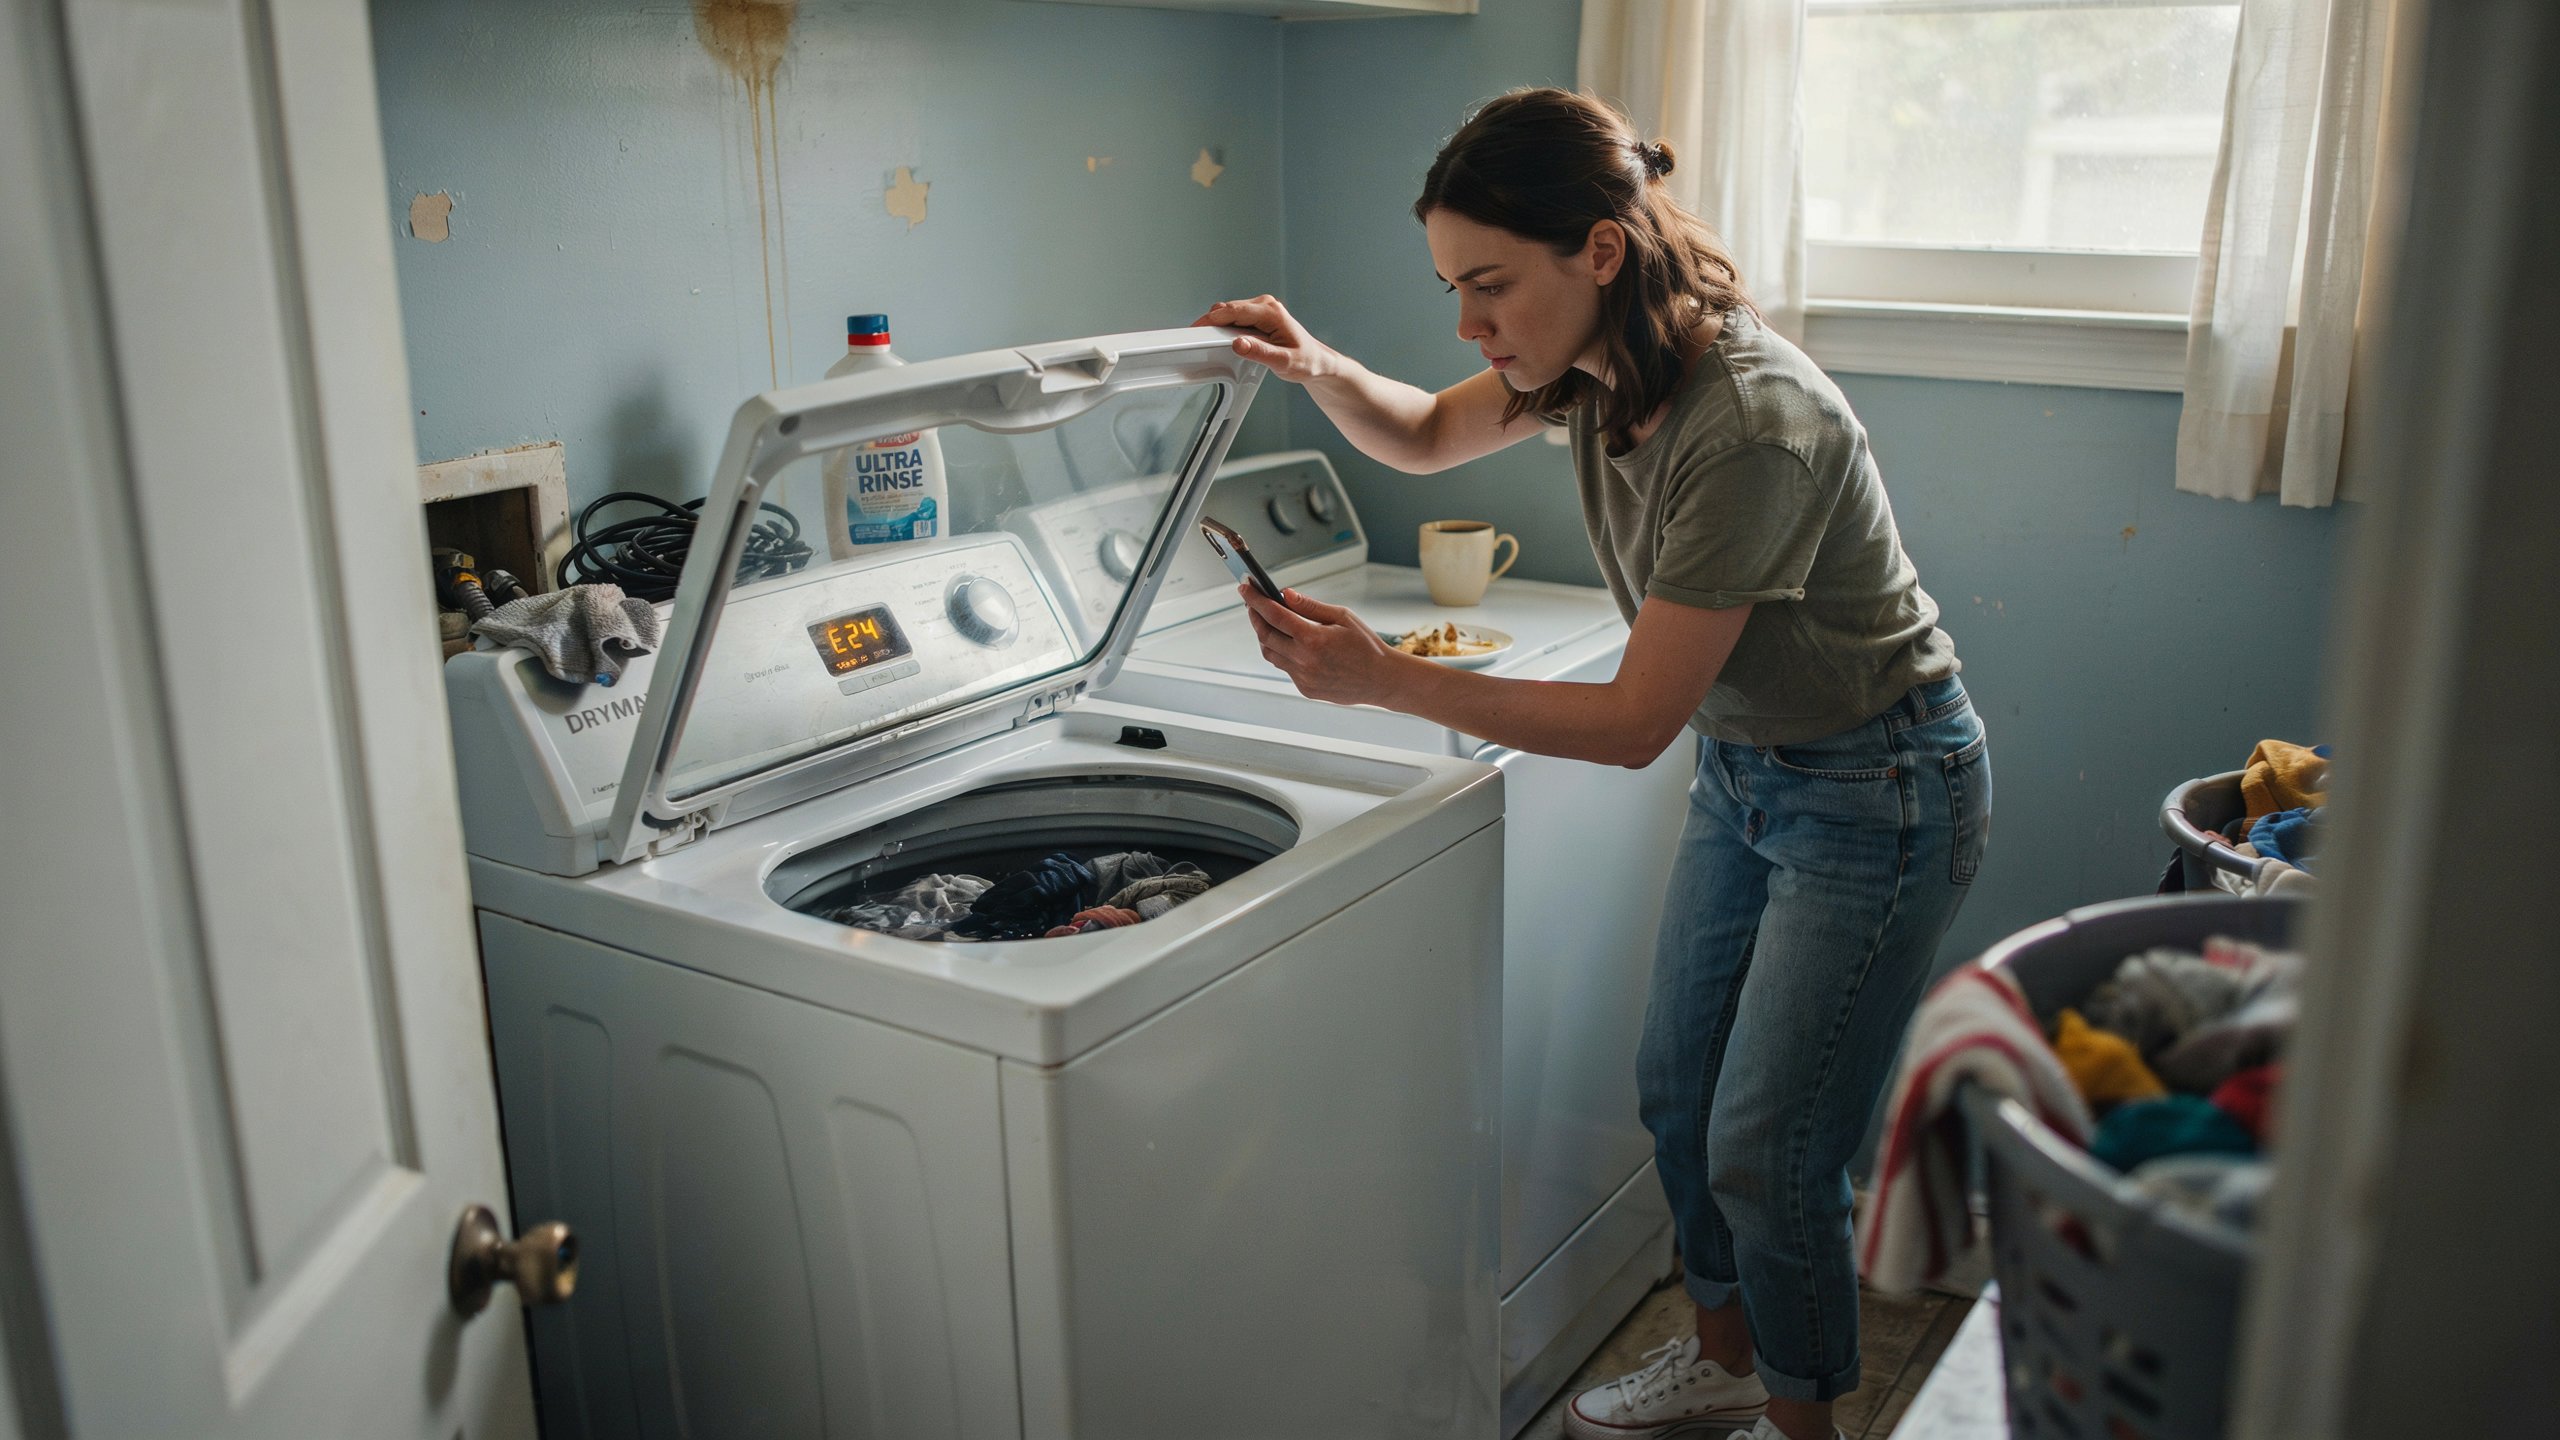
When your washer stops draining or will not spin, you are left with a heavy tub full of water and soaking clothes. The most common culprits are a clogged drain pump filter, a blocked drain hose, an unbalanced load, or a lid/door switch that is not engaging properly. Large repair datasets show that washing machines are the single most frequently repaired appliance, accounting for about one in three service interventions, and “won’t drain” is one of the top reported faults.
Step‑by‑step DIY fix
-
Stop the cycle and unplug the machine. Never reach into a moving drum or open panels while it is powered.
-
Check for simple load issues (5–10 minutes). Open the lid or door and redistribute heavy items like blankets or towels, then try a spin‑only cycle. Sometimes the washer will not spin if the load is badly unbalanced.
-
Inspect the drain hose (10–15 minutes). Pull the machine slightly forward, check that the drain hose is not kinked, crushed, or frozen (in cold climates), and make sure it is not pushed too far into the standpipe, which can cause siphoning.
-
Clean the drain pump filter (15–30 minutes). Many front‑loaders have a small access door near the bottom. Place a shallow pan or towel underneath, open the cap slowly, drain out the water, and remove coins, lint, or small items blocking the filter.
-
Check the lid or door switch (10–15 minutes). If the machine will not spin at all and does not sense the door as closed, the safety switch may be faulty. On some models you can gently press the switch with a pen to see if the drum starts in a spin cycle; do not bypass it permanently.
Estimated time: 30–60 minutes.
Estimated cost: Usually 0–50 dollars for cleaning or a basic replacement part, compared to 150–400 dollars for professional pump or control repairs.
Prevention tips
Do not overload the washer; technicians report that overloading is a leading cause of failures, especially on modern high‑efficiency models. Empty pockets before washing, run a cleaning cycle monthly, and check and clean the pump filter every few months if your machine has one.
Call a pro if…
Call a professional if the washer will not power on at all, if you see error codes you cannot clear, if it trips breakers, or if you hear loud grinding or banging even with balanced loads, which can indicate bearing, suspension, or motor problems.
3. Air conditioner not cooling or leaking water
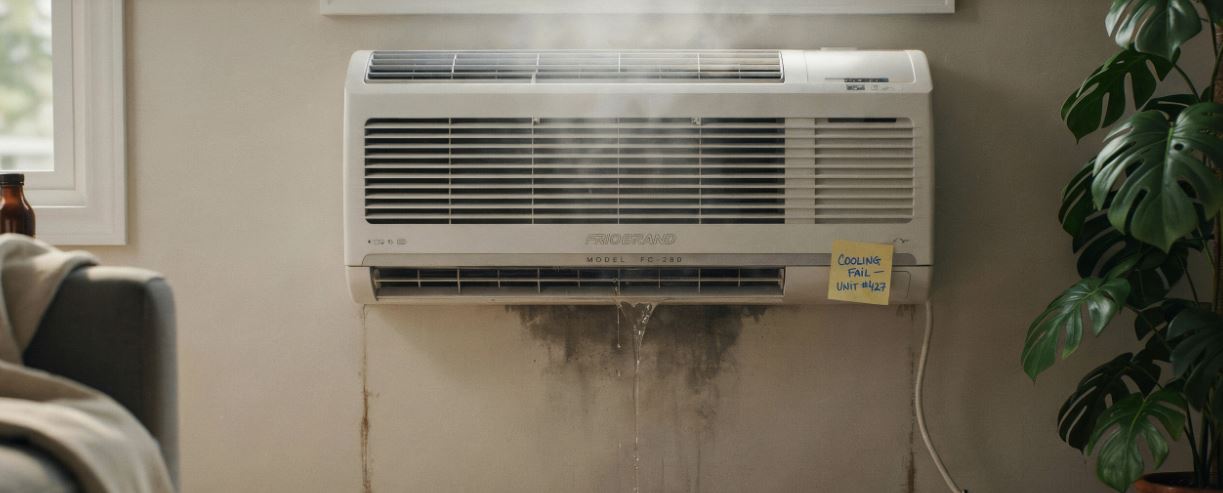
A home air conditioner that blows warm air or leaks water indoors can make summer unbearable. Common causes include a clogged air filter, a dirty evaporator or condenser coil, low refrigerant, or a blocked condensate drain. For window or split AC units, indoor water leaks often come from a blocked drain channel or a unit that is not tilted correctly.
Step‑by‑step DIY fix (central or split AC)
-
Turn off power. Switch off the AC at the thermostat and at the breaker to work safely.
-
Check and replace the air filter (5–10 minutes). A dirty filter restricts airflow and can cause freezing and poor cooling. Replace it if it looks gray or clogged.
-
Inspect the outdoor unit (10–20 minutes). Clear leaves, plants, and debris at least 1–2 feet around the condenser. Gently rinse the fins with a garden hose from the outside in, avoiding high‑pressure settings.
-
Clear the condensate drain (15–30 minutes). For many systems, you can use a wet/dry vacuum at the outside drain line to suck out clogs, or pour a small amount of diluted vinegar into the access opening to help dissolve algae.
-
Check thermostat settings. Make sure it is set to “cool” and that the temperature is lower than the current room temperature, then give the system 15–30 minutes to respond.
Estimated time: 30–90 minutes.
Estimated cost: 0–30 dollars for filters and cleaning, versus roughly 150–500 dollars for a professional service visit, refrigerant recharge, or component replacement depending on your market.
Prevention tips
Change filters every 1–3 months during heavy use, keep outdoor units clear of plants and debris, and have a professional do a full tune‑up once a year to check refrigerant levels and electrical components. For window units, ensure proper tilt so water drains outside, and clean the internal drain channel at the start of each cooling season.
Call a pro if…
Call an HVAC technician if the system short‑cycles repeatedly, if the outdoor unit makes loud screeching or grinding noises, if ice forms on the refrigerant lines, or if cooling does not improve after cleaning and filter changes. Refrigerant leaks and electrical faults are not DIY safe.
4. Dishwasher not cleaning or leaving residue
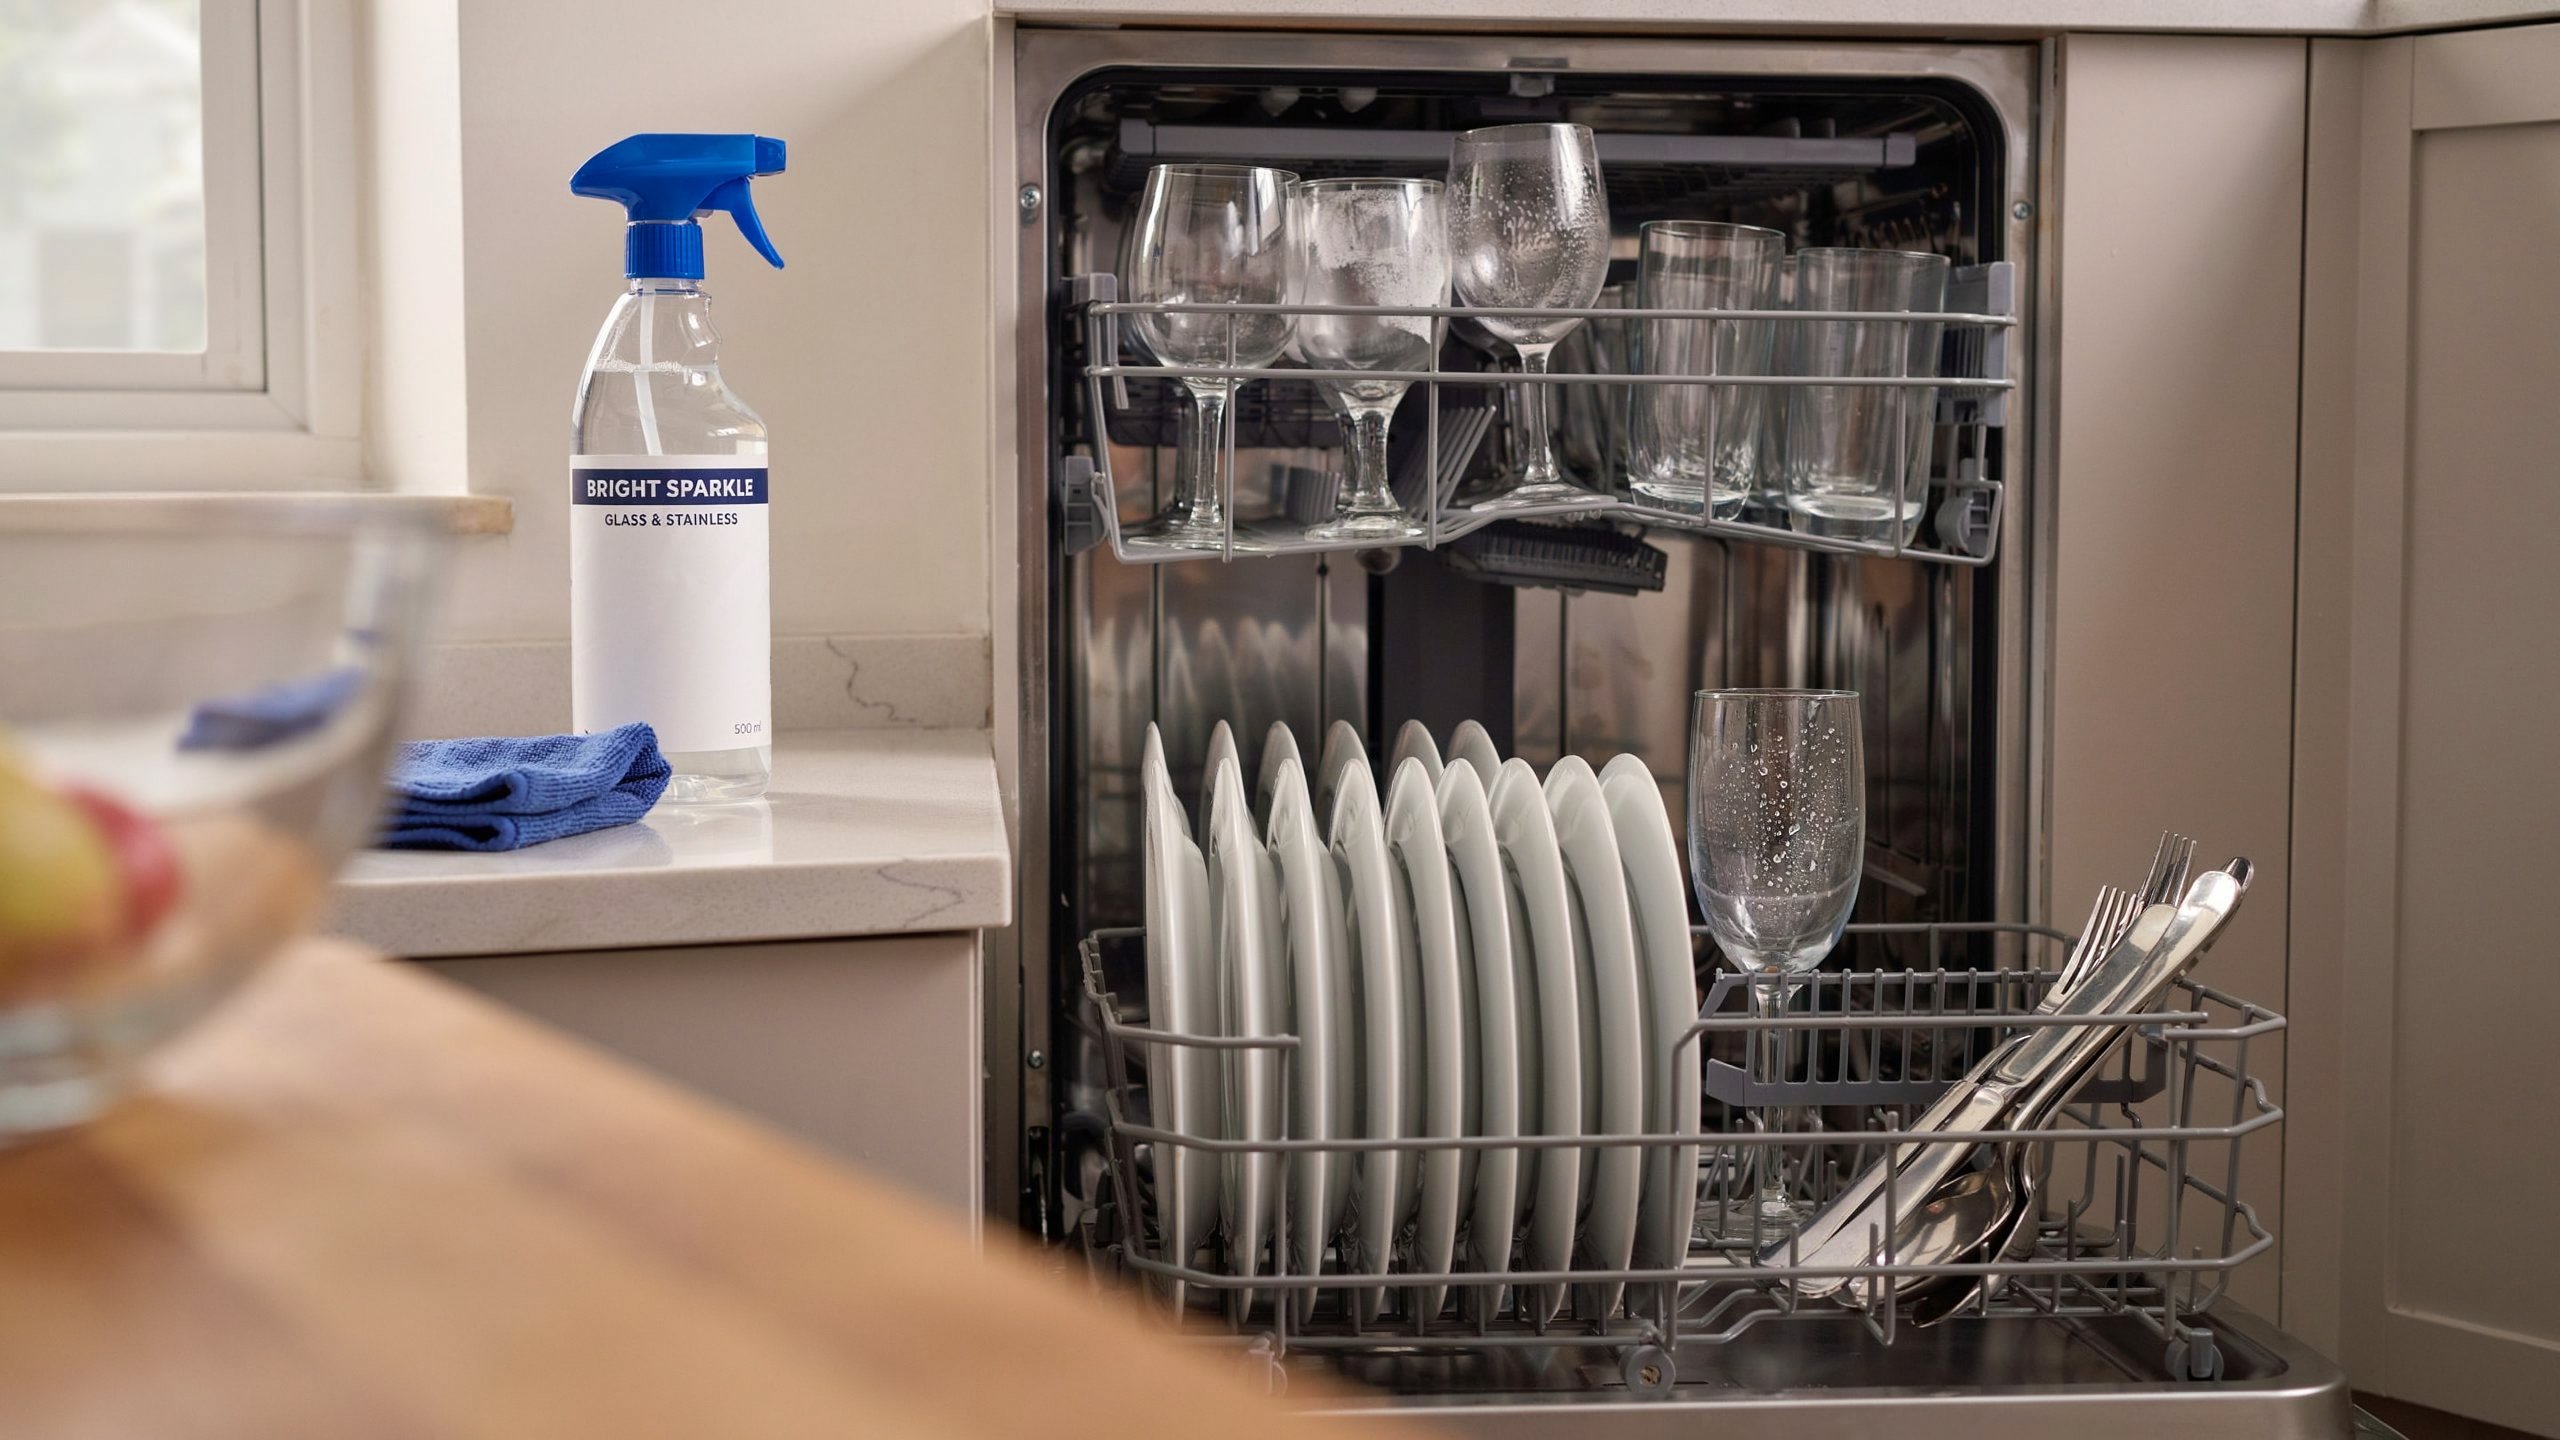
A dishwasher that leaves food stuck to plates or a cloudy film on glasses is frustrating, especially when you end up rewashing everything by hand. According to consumer surveys, “not cleaning properly” is one of the top complaints for dishwashers, followed by poor drying and drainage issues. Often the cause is simple: a clogged filter, blocked spray arms, or incorrect loading rather than a failed motor.
Step‑by‑step DIY fix
-
Clean the filter (10–15 minutes). Remove the bottom rack, twist and lift out the filter assembly, and rinse it under warm water to clear food particles. Use a soft brush if needed.
-
Clear spray arm holes (10–15 minutes). Remove the spray arms if your model allows it and poke out clogged holes with a toothpick or soft brush, then rinse well.
-
Check water temperature (5 minutes). Dishwashers clean best with incoming water at around 120°F (about 49°C). Run the kitchen tap until hot before starting a cycle to prime the line.
-
Use the right detergent and cycle. Make sure you are using dishwasher‑approved detergent and rinse aid, and match the cycle to the soil level; heavy or pots cycles use hotter water and longer wash times.
-
Load correctly. Avoid nesting bowls and spoons, keep large items from blocking the spray arms, and tilt items so water can drain.
Estimated time: 30–60 minutes.
Estimated cost: Usually limited to detergent and maybe a cleaning agent, versus 150–350 dollars for motor, pump, or control repairs.
Prevention tips
Scrape (but do not fully rinse) heavy food off dishes, clean the filter monthly, and run a dishwasher cleaner once every 1–3 months to reduce mineral buildup and grease. Avoid overloading and do not block the detergent dispenser with large items.
Call a pro if…
Call a technician if the dishwasher does not fill with water, does not drain even after cleaning the filter and checking the drain hose, shows repeated error codes, or leaks onto the floor. Pump, valve, or control board issues are better handled by a professional.
5. Dryer not heating or taking too long
A dryer that runs but does not dry clothes wastes time and energy. Common causes include a clogged lint screen, a blocked vent duct, an overloaded drum, or a failed heating element or thermal fuse. Dryer issues are among the most common appliance complaints, with “clothes not drying” a top frustration for owners.
Step‑by‑step DIY fix
-
Clean the lint screen (2–5 minutes). Remove the lint filter and clean it before every load. Wash it with warm soapy water occasionally if fabric softener buildup is visible.
-
Check the vent hose (10–20 minutes). Unplug the dryer, pull it out, and inspect the vent hose for kinks or crushed sections. Disconnect it and vacuum out lint from the hose and the vent opening.
-
Inspect the exterior vent (10–15 minutes). Go outside and check that the flap opens freely and is not blocked by lint, leaves, or nests; clean as needed.
-
Try a smaller load and correct settings. Very large loads or low‑heat settings can dramatically increase dry time.
Estimated time: 30–45 minutes.
Estimated cost: 0–30 dollars for cleaning supplies and possibly a new vent hose, compared to 100–400 dollars for professional repairs involving heating elements, fuses, or motors.
Prevention tips
Always clean the lint screen between loads and have the full vent path professionally cleaned every 1–3 years, especially for long or complex duct runs. Avoid drying extremely heavy mixed loads, and do not run the dryer without proper venting to the outside.
Call a pro if…
Call a technician immediately if the dryer smells like burning, if the exterior of the cabinet becomes extremely hot, if it trips breakers, or if there is no heat at all after you have cleaned the vent and checked settings. Those signs can point to dangerous overheating or electrical faults.
6. Oven / range not heating evenly
Uneven baking, raw centers, or one side of the pan burning are common complaints with both gas and electric ranges. Consumer data shows frequent issues with oven heating elements, igniters, and temperature sensors. In many cases, a simple recalibration, cleaning, or replacing a visible bake element solves the problem.
Step‑by‑step DIY fix
-
Confirm the problem. Use an inexpensive oven thermometer to compare set temperature with actual temperature; many ovens are off by 10–25 degrees.
-
Check bake and broil elements (electric). With the oven off and cool, visually inspect the elements for blisters or breaks. Turn on the oven and watch for the bake element to glow evenly red; if a section stays dark, it may be failing.
-
Clean the oven. Heavy grease and burned‑on food can affect airflow and heat distribution. Use the manufacturer‑recommended cleaning method and avoid covering racks or ventilation slots with foil.
-
Reposition racks and pans. If only certain rack positions cause uneven results, adjust placement and avoid pans that crowd walls.
Estimated time: 30–60 minutes for basic checks and cleaning.
Estimated cost: 0–20 dollars for a thermometer and cleaning products, or 150–500 dollars if a professional must replace igniters, elements, or control boards.
Prevention tips
Avoid slamming oven doors, which can loosen hinges and seals, and do not line the bottom with foil that blocks airflow. Run the self‑clean cycle only as often as needed, because the extreme heat can stress components.
Call a pro if…
Call a qualified technician if the oven smells strongly of gas, fails to ignite, displays persistent error codes, or if you suspect a faulty temperature sensor or control board. Gas leaks and internal wiring are not safe DIY jobs.
7. Garbage disposal clogged or not running
A jammed garbage disposal usually feels worse than it is. Many units stop working due to food jams, tripped reset buttons, or minor obstructions rather than burned‑out motors. Home repair cost guides list typical professional charges of 75–250 dollars for disposal repairs or replacement, but many clogs can be cleared in minutes with no parts.
Step‑by‑step DIY fix
-
Turn everything off. Switch off the disposal and, for extra safety, flip the breaker off.
-
Press the reset button (2 minutes). Most disposals have a small red or black reset button on the bottom. If it has tripped, the unit will be dead until you press it back in.
-
Clear visible jams (5–10 minutes). Use a flashlight to look into the drain. Never put your hand inside. Use tongs or pliers to remove bones, utensils, or other foreign objects.
-
Use an Allen key (10–15 minutes). Many models include a hex socket on the bottom of the motor. Insert the matching Allen wrench and turn it back and forth to free stuck impellers.
-
Test with water running. Restore power, run cold water, and turn the disposal on briefly. If it runs smoothly, the jam is cleared.
Estimated time: 10–30 minutes.
Estimated cost: 0 dollars if it is just a jam, versus 75–250 dollars if a technician must replace the unit or motor.
Prevention tips
Run plenty of cold water before, during, and after using the disposal, avoid fibrous foods like corn husks or celery, and cut large scraps into smaller pieces. Never grind hard bones, glass, or metal.
Call a pro if…
Call a technician or plumber if the disposal still hums but the impeller will not turn even with a wrench, if the housing is cracked and leaking, or if it trips the breaker repeatedly. Those are signs of motor failure or internal damage.
8. Microwave not heating food
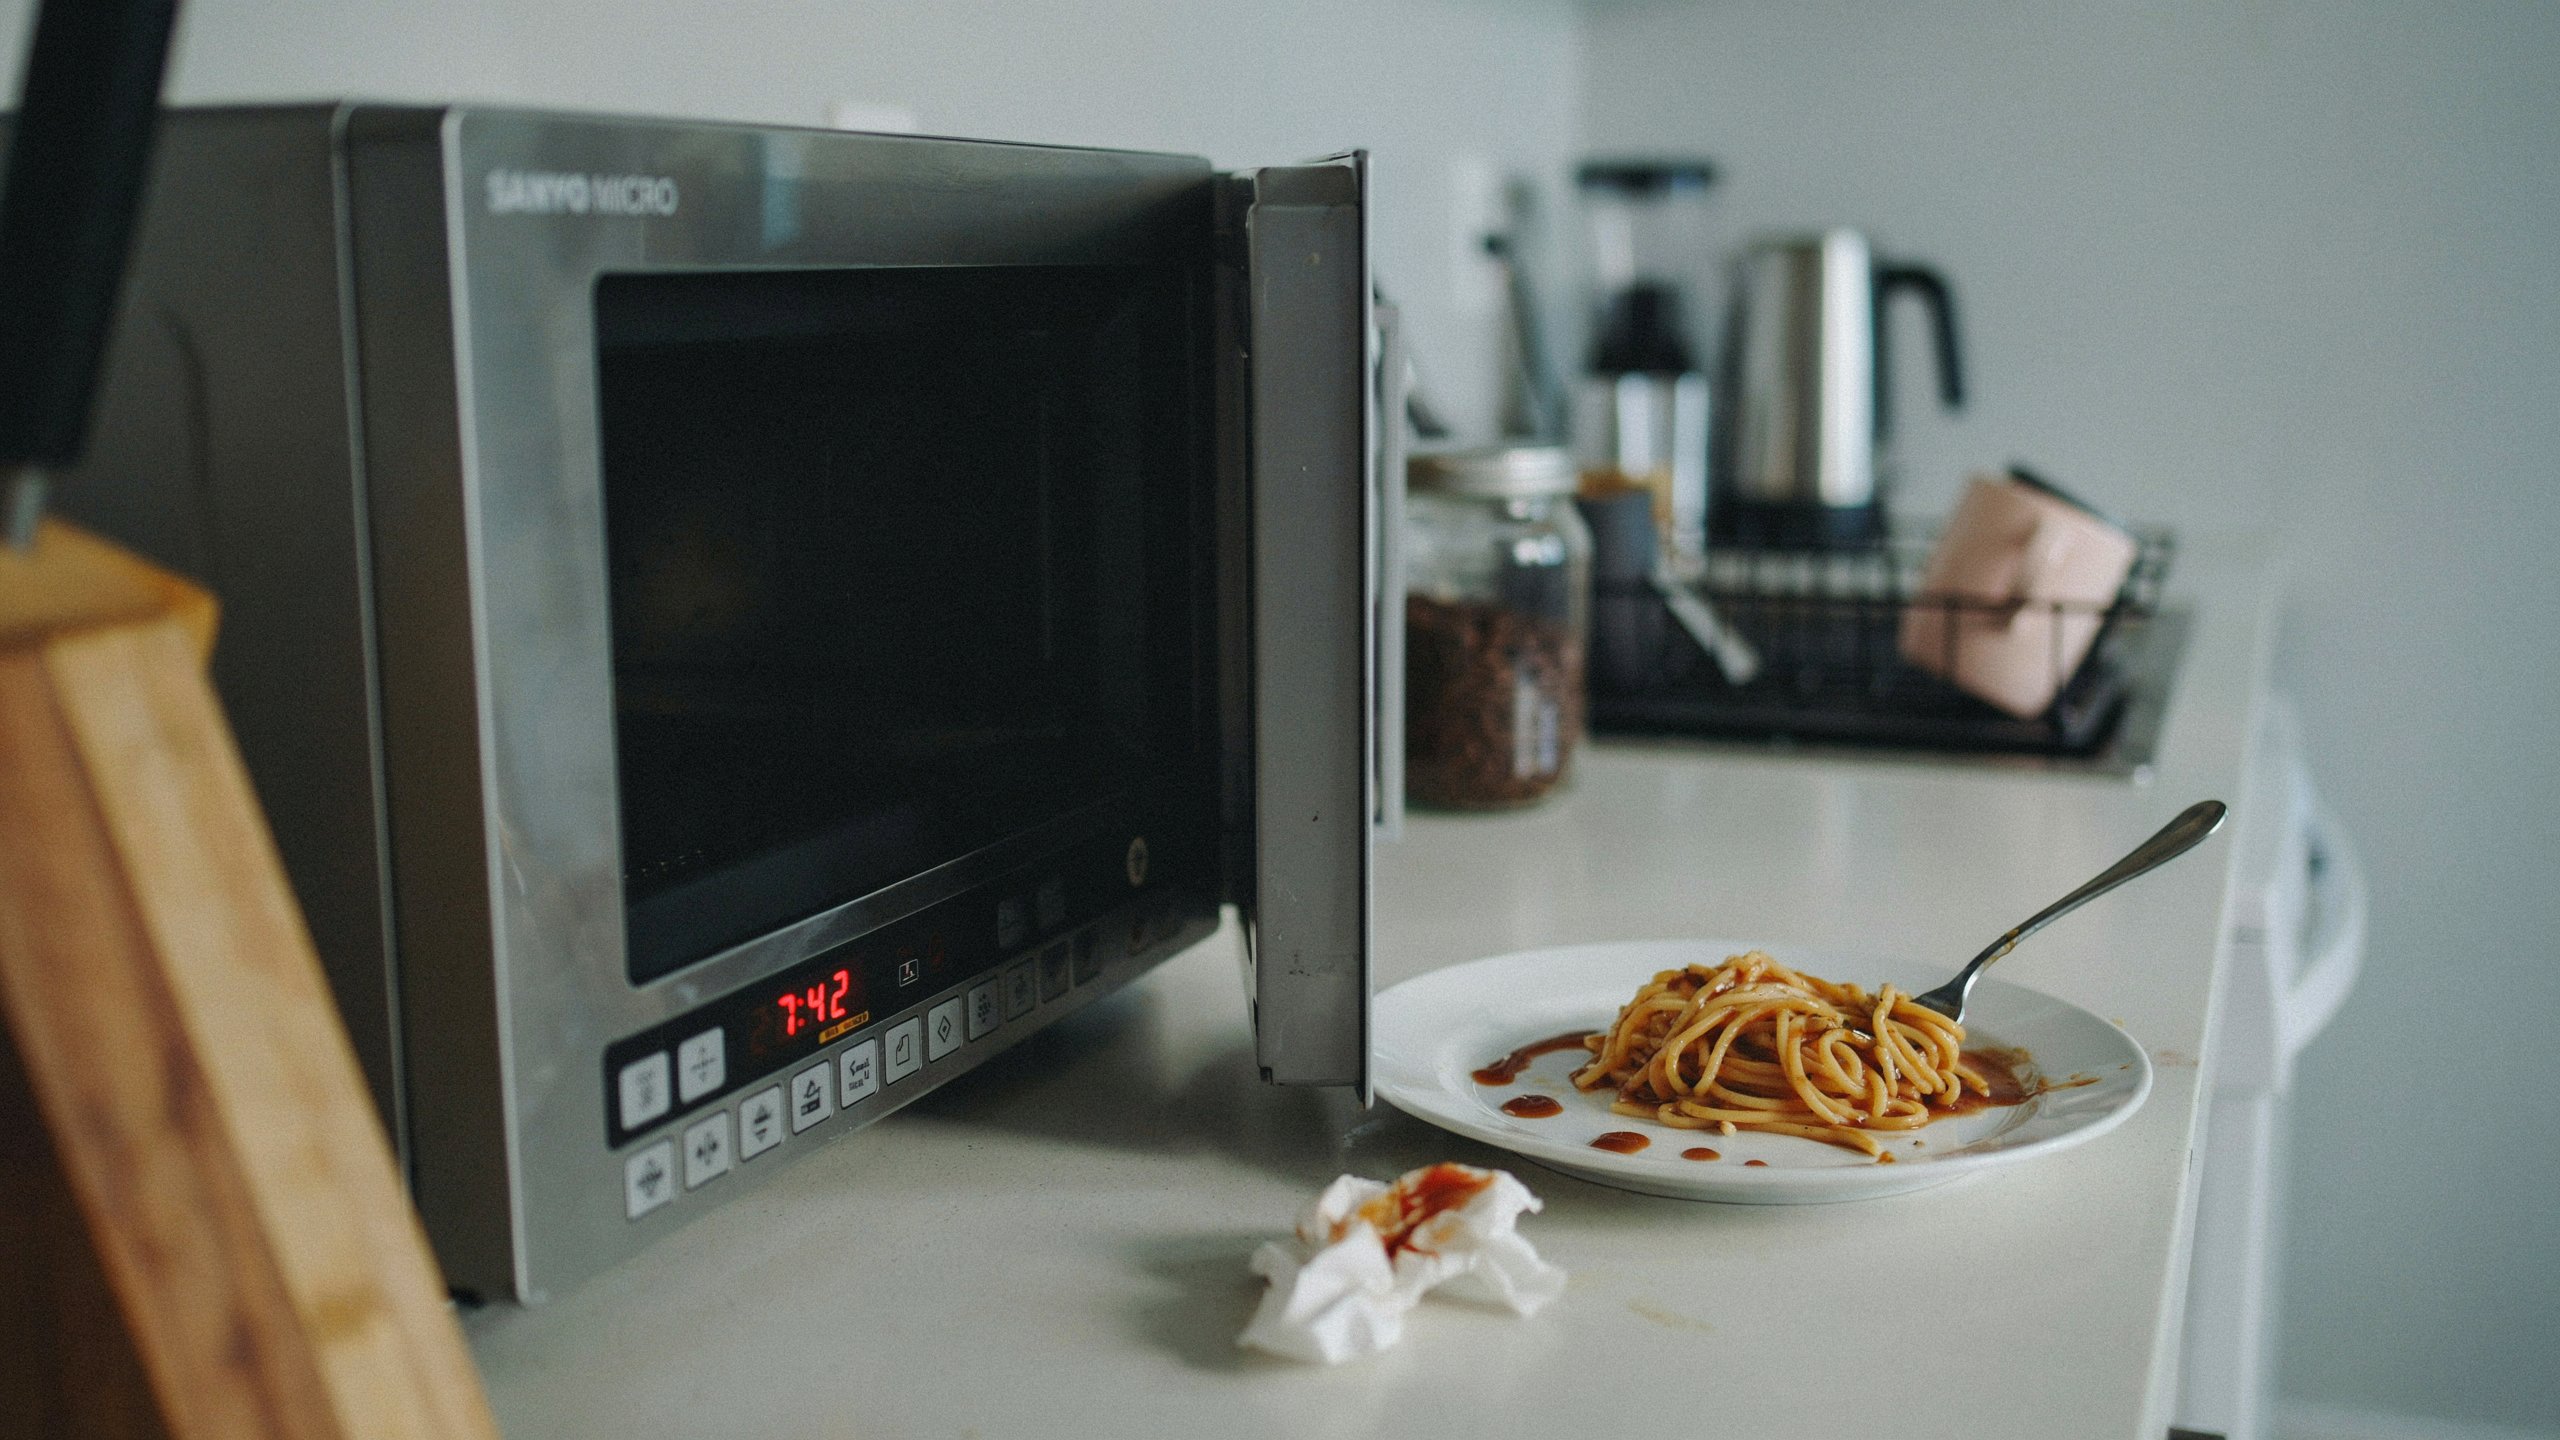
When a microwave runs but food stays cold, the problem can be as simple as using the wrong settings or as serious as a failed magnetron or high‑voltage component. Surveys of common microwave complaints highlight control panel issues, door latch failures, and poor heating as frequent problems.
Step‑by‑step DIY fix (basic checks only)
-
Try another outlet and simple reset. Unplug the microwave for a few minutes, then plug it back in and test with a microwave‑safe cup of water.
-
Check the door. If the door does not close firmly or the latch feels loose, the safety interlocks may not engage, and the microwave will not heat even though lights and turntable work.
-
Test different settings. Make sure you are not on a low power level, timer, or “keep warm” mode that gently heats instead of cooking.
-
Inspect the turntable and waveguide cover. Remove the glass plate and roller ring and clean off spills. Check the small rectangular waveguide cover inside for burning or damage; if it is damaged, it should be replaced with the correct part.
Estimated time: 15–30 minutes.
Estimated cost: Usually 0–50 dollars for simple parts like a turntable or door latch, versus 75–200 dollars for professional repairs involving magnetrons, capacitors, or control boards.
Safety warning
Microwaves store high voltage even when unplugged because of internal capacitors. Opening the cabinet and working on internal parts is not safe for DIY unless you are trained and fully understand discharge procedures.
Prevention tips
Cover food to reduce splatters, do not run the microwave empty, and avoid using damaged or metal containers inside. Clean the interior regularly so food buildup does not burn or damage the waveguide cover.
Call a pro if…
Call a professional or replace the unit if the microwave makes loud buzzing or sparking noises, if you see or smell smoke, or if heating does not improve after basic checks. Internal high‑voltage repairs are not DIY friendly.
9. Ice maker not producing ice
Refrigerator ice makers are convenient, but they are also one of the most common sources of service calls. Many “no ice” complaints are traced to the water supply being turned off, a kinked water line, or a clogged water filter rather than a failed ice maker assembly.
Step‑by‑step DIY fix
-
Check the ice maker switch. Some models have a small on/off arm or switch. Make sure it is in the “on” position and not accidentally bumped off.
-
Inspect the water line (10–15 minutes). Look behind the fridge to confirm the water line is connected, the shutoff valve is open, and the line is not kinked or pinched.
-
Replace the water filter (10 minutes). If you have not replaced the filter in 6–12 months, it may be clogged and restricting flow. Use the correct filter specified by the manufacturer.
-
Check freezer temperature. Ice makers need the freezer to be cold enough, usually around 0°F. If the freezer is too warm, address overall cooling problems first.
-
Wait one full day. After changes, allow 24 hours for the ice bin to refill; ice production is not instant.
Estimated time: 20–45 minutes of hands‑on work.
Estimated cost: 20–60 dollars for a new filter or basic water line parts, versus 100–225 dollars for a professional to diagnose and replace ice maker components.
Prevention tips
Replace water filters on the schedule recommended by the brand, avoid frequently turning the ice maker on and off, and keep the freezer at a steady, proper temperature.
Call a pro if…
Call a technician if the ice maker leaks inside the freezer, if cubes are consistently hollow or oddly shaped even after filter replacement, or if the ice maker shows visible cracks, burning, or never cycles at all while the freezer temperature is correct. Those are signs that the module, fill valve, or control board may need professional replacement.
10. Water heater not heating or leaking
Few things are more uncomfortable than stepping into a shower and getting nothing but cold water. Common causes of water heater problems include a tripped breaker or pilot light, failed heating elements or thermostats, sediment buildup, or tank corrosion leading to leaks. Repair cost guides put typical water heater repairs in the 150–700 dollar range in 2026, depending on parts and labor.
Step‑by‑step DIY fix (basic electric water heater checks)
-
Turn off power. Switch off the breaker dedicated to the water heater before you remove any access panels.
-
Check the breaker and reset buttons (10 minutes). Confirm the breaker is not tripped. On many electric heaters, you can remove the upper access panel and press the high‑temperature cutoff reset button after power is off.
-
Adjust thermostat settings (10 minutes). With power still off, check that thermostats are set to a reasonable temperature (often around 120°F) and are not set too low.
-
Flush some sediment (20–30 minutes). Attach a garden hose to the drain valve at the bottom, turn off the cold water supply, open a hot tap somewhere in the house, and carefully open the drain valve to flush out sediment until the water runs clearer. Close the valve, remove the hose, turn water back on, and restore power after the tank refills fully.
Estimated time: 30–60 minutes.
Estimated cost: Often 0–20 dollars for hoses and basic supplies if it is just a reset or flush, versus 150–700 dollars when elements, thermostats, or valves must be replaced by a professional.
Safety and prevention tips
Never work on a water heater with power or gas still on, and be careful with hot water and steam when you open drain valves. Once a tank begins to leak from the body itself (not just fittings), it usually needs full replacement. To extend life, flush the tank at least once a year to reduce sediment, and consider installing a leak detector and pan if the heater is in a finished space.
Call a pro if…
Call a licensed plumber or technician if you have a gas water heater with pilot or burner issues, if you smell gas, see rust‑colored water, notice significant leaks, or experience frequent breaker trips. Gas and high‑current electrical work should not be done DIY.
Smart preventive maintenance calendar for 2026
A simple maintenance calendar can dramatically cut your risk of sudden breakdowns. Repair statistics show that lack of maintenance is a major cause of early failures, especially for refrigerators and washers. Many homeowners admit they rarely or never perform preventive tasks even though most are quick and inexpensive.
Suggested maintenance schedule
Energy‑saving tie‑ins
Many of these tasks also cut energy bills. Clean refrigerator coils help the compressor run less often, lowering power use while improving cooling. Replacing clogged dryer vents and AC filters keeps air moving, so heating and cooling systems do not have to work as hard. Even small steps like fixing dripping hot water connections or insulating accessible hot water pipes can reduce wasted energy over a year.
Caring for modern smart appliances
Smart fridges, high‑efficiency washers, and connected ovens rely on sensors and software that expect regular use and maintenance. Keep apps updated, review error logs or notifications, and follow brand‑specific care guides for cleaning sensors, detergent drawers, and camera or display surfaces. Many brands now push maintenance reminders directly to your phone—these are worth following, because ignoring them can shorten appliance life or cause avoidable faults.
Seasonally, prepare early: clean and test your AC a few weeks before peak summer heat, and clean dryer vents and washer filters before winter, when clothes dryers and hot water demand tend to increase. This way you are not trying to schedule emergency service during the busiest periods for repair companies.
How to hire a trustworthy appliance repair professional
Even with good DIY skills, there will be times you need a professional. Average repair costs in 2026 run around 150–400 dollars per appliance, with national averages around 200 dollars including parts and labor, plus a 50–130 dollar service call fee in many markets. Because of those costs, choosing the right technician can save money and prevent repeat problems.
Green flags vs. red flags
Positive signs include clear online reviews, proper licensing and insurance where required, transparent pricing (including diagnostic fees and hourly rates), and technicians who are willing to explain the problem and your options. Many reputable services also provide written estimates and offer a warranty on both parts and labor.
Red flags include vague or cash‑only pricing, pressure to replace rather than repair without a clear explanation, refusal to provide a written quote, or no physical address or verifiable business information. Be cautious if a company cannot name the brands they are familiar with or seems unfamiliar with your specific model, especially for high‑end or smart appliances.
Questions to ask
Before you book, ask:
-
What is your diagnostic or service call fee, and is it applied to the repair if I go ahead?
-
Do you charge flat rates or hourly, and what is the typical range for my appliance type?
-
Are your technicians trained or certified for my brand?
-
Do you offer a warranty on parts and labor, and for how long?
-
What is your estimated response time for urgent issues like leaks or no‑cool situations?
Compare answers from a couple of local providers or use reputable platforms that pre‑screen technicians.
Alternatives and warranty tips
For newer appliances still under warranty, it often makes sense to contact the manufacturer or retailer first. Many manufacturers offer in‑network service partners and may cover parts, labor, or both if the fault is within warranty terms. Big‑box stores sometimes bundle extended protection plans with new appliances; these can be helpful if they cover common failures and do not have excessive exclusions.
Always read your warranty terms before authorizing independent repairs, because unauthorized work can void coverage for certain parts. Keep receipts, serial numbers, and service records together so you can prove maintenance and claim coverage when needed.
Frequently asked questions
Is it worth repairing a 10‑year‑old refrigerator?
In many cases, yes—repair technicians report that in almost 90 percent of visits, repairing the appliance is more cost‑effective than replacing it. However, if repair estimates exceed roughly half the cost of a similar new model, or if the fridge has multiple major issues (for example, compressor plus control board), replacement may make more sense.
How much should I expect to pay for a typical appliance repair?
Across sources, the average repair runs roughly 150–400 dollars per appliance, including parts and labor, with some ranges stretching from 100 to 700 dollars depending on the appliance and problem. Service call or diagnostic fees of 50–130 dollars are also common.
How often do appliances really break down now?
Large repair datasets show that washing machines, dishwashers, and fridges account for most repairs, with washing machines alone making up about 33 percent of interventions. Survey data also suggests that a majority of households have experienced at least one appliance breakdown in recent years, often during busy cooking periods.
Why do new appliances seem to fail sooner than older ones?
Studies and field reports point to a mix of factors: more complex electronics, thinner materials, higher operating stresses, and, critically, less preventive maintenance by owners. Features like control boards, touch panels, and Wi‑Fi modules add convenience but also create more potential failure points.onlinelibrary.
How do I reset a smart appliance that is glitching?
Start with a simple power cycle: unplug the appliance or switch off the breaker for a few minutes, then restore power and test. Next, check the brand’s app for firmware updates and reconnect the appliance to Wi‑Fi if it has gone offline. Only perform factory resets if instructed by the manufacturer, because they can erase settings and may affect integration with other smart home devices.
When should I avoid DIY and call a pro immediately?
Any time you smell gas, see sparking or burned wiring, experience repeated breaker trips, or deal with sealed system components (refrigerant lines, compressors, high‑voltage microwave parts), you should stop and call a licensed technician. Water leaks inside walls or ceilings and significant tank leaks from water heaters also require professional help.
Does preventive maintenance really make a difference?
Yes. Surveys of technicians highlight owner neglect as a leading cause of early breakdowns, especially for washers and fridges. Simple tasks like cleaning coils, filters, and vents, and doing annual water heater flushes can significantly extend appliance life and reduce emergency repairs.
Should I buy an extended warranty for new appliances?
It depends on the cost, coverage details, and your risk tolerance. Some extended plans can pay off for high‑end or complex smart appliances that are expensive to repair out of warranty, but many plans have exclusions that limit usefulness. Always compare the plan price to typical repair costs for that appliance type.
Conclusion and next steps
Home appliances fail more often than most people expect, but a surprising number of issues come down to basic things you can fix yourself: cleaning coils and filters, clearing clogs, resetting safety switches, and using the right settings. With a small set of tools, a simple maintenance calendar, and a clear sense of when to stop and call a pro, you can prevent many breakdowns, handle minor ones calmly, and avoid paying for avoidable service calls.
Use this guide as your go‑to reference the next time something stops heating, draining, cooling, or spinning. Start with the quick checks, follow the safety rules, and do not hesitate to reach out to a trusted technician for anything involving gas, high voltage, or major leaks. Sharing what you learn and keeping notes on past repairs will also help you make smarter choices about warranties, replacements, and new appliance purchases in the years ahead.